Bootstrap ubuntu as server
Disclaimer this is a long guide, you might want to drink coffee first
Used proxmox add additional notes into installing on other physical devices / vm
Downloading Ubuntu
We are not savages so we are gonna use the LTS version, feel free to use other versions as of the date of this writing the latest is Ubuntu Server 22.04.2 LTS
Go to this page
Click on the download button an ISO file will be downloaded for you.
Things to do when download is completed
- Link will be added here in the future after i write a specific guide using the following
- Bootable Flashdrive for physical installation
- VM using VMWare or VirtualBox
- Promox Instance
Installing Ubuntu Server
- Start the machine
- Boot into the installation medium
- Detailed steps and screens are provided below
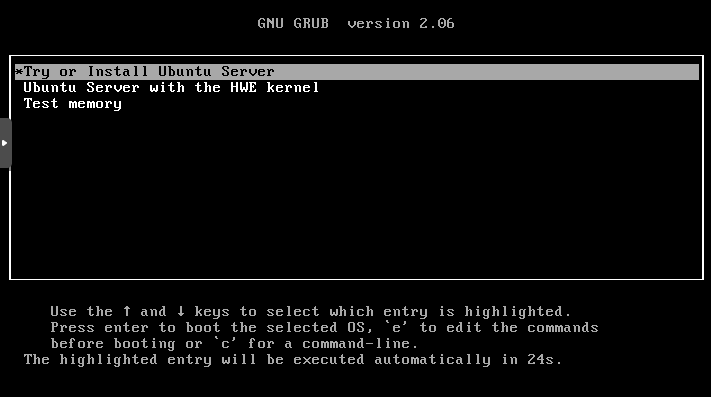
First Screen
Select *Try or Install Ubuntu Server press enter
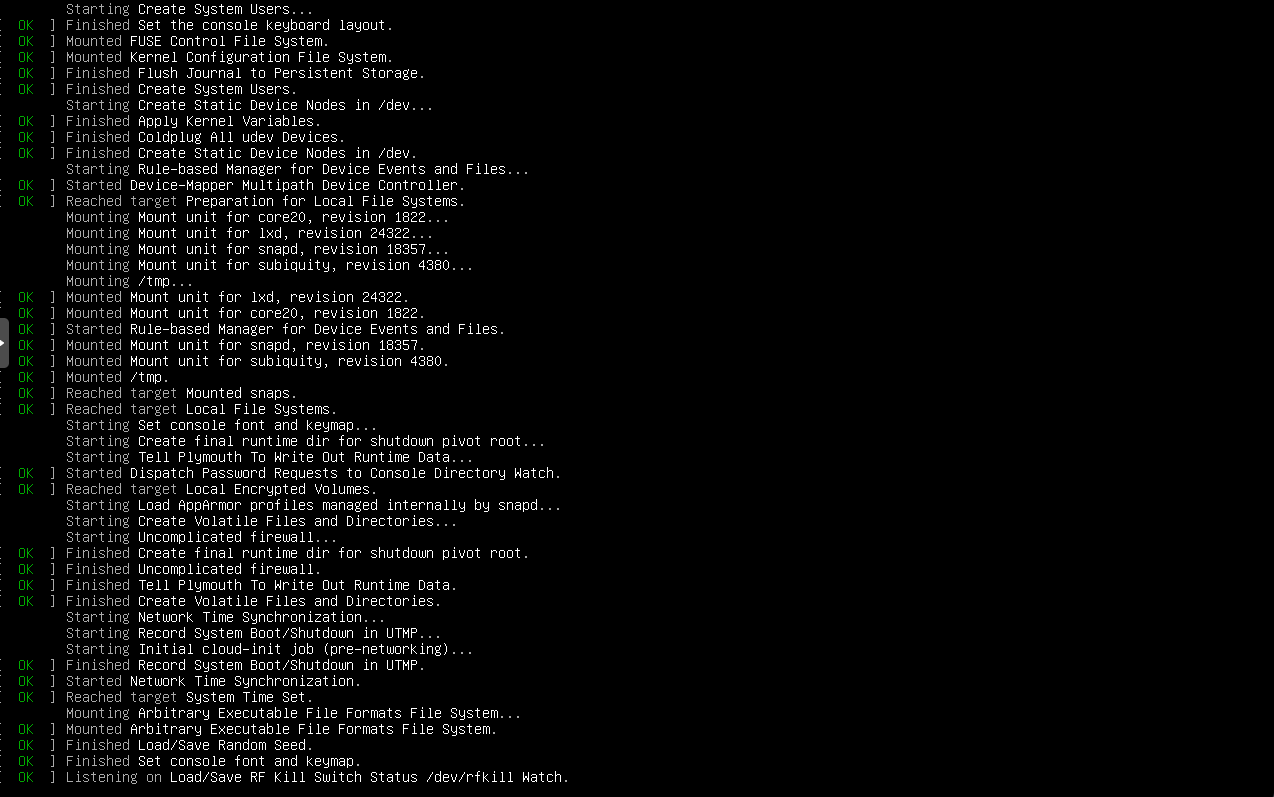
Ubuntu Live Boot
Wait for the live boot to finish
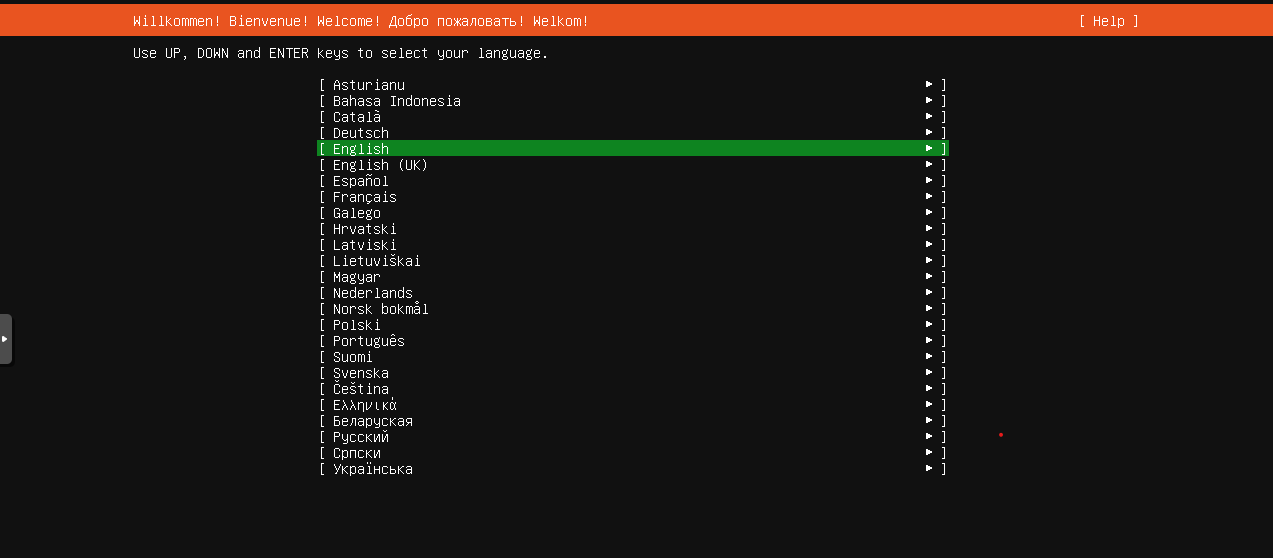
Select Language
Select desired language, this is different from setting your locale
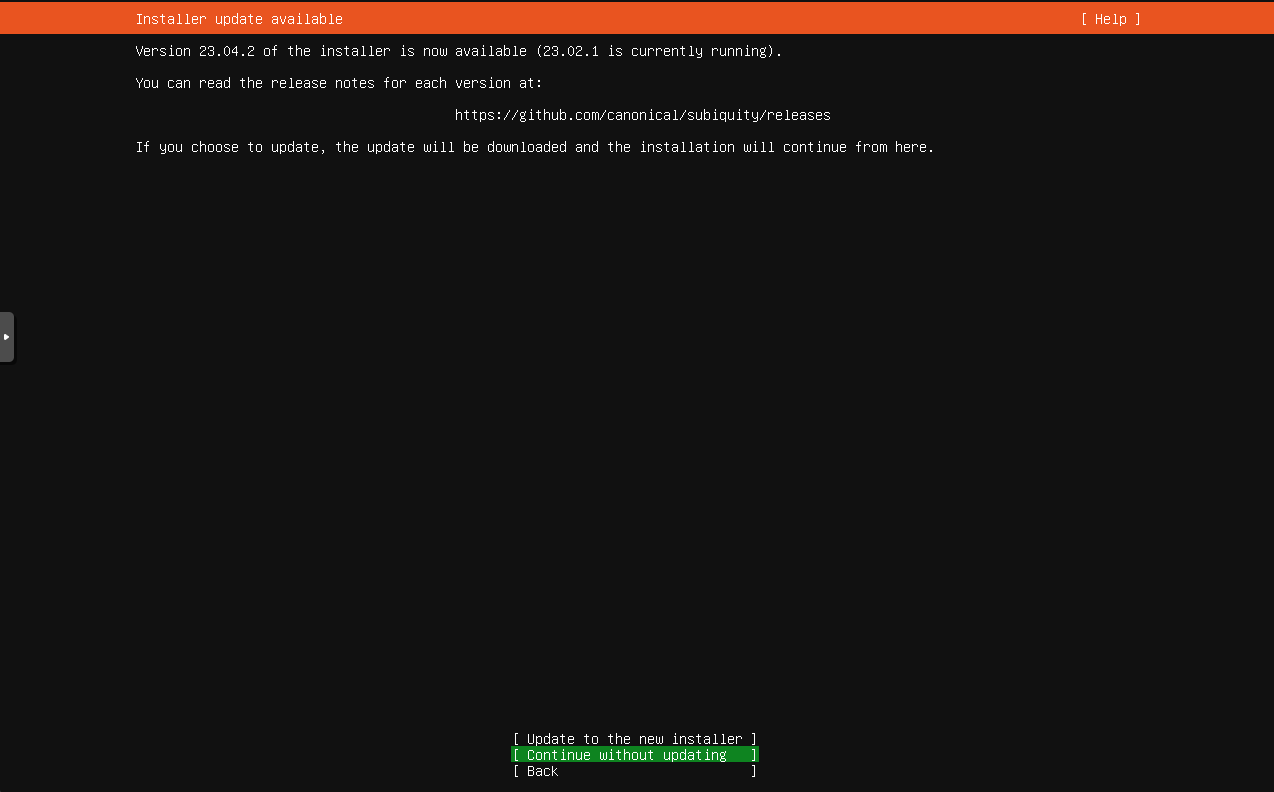
Installer Update
The installer will update itself, feel free to skip this part
use the arrow keys to navigate to Continue without updating and press enter
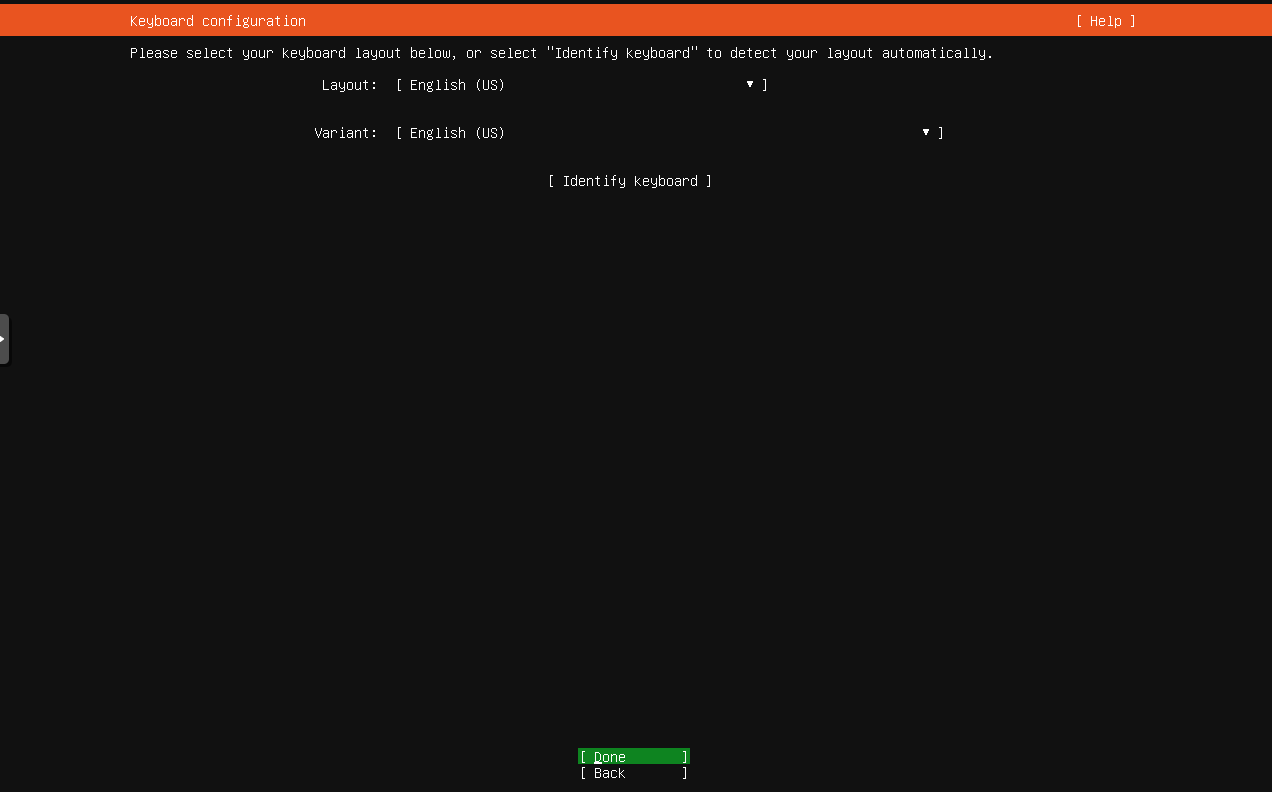
Selecting Keyboard Layout
Keyboard layout most of the keyboard that are in PH is English(US/QWERTY)
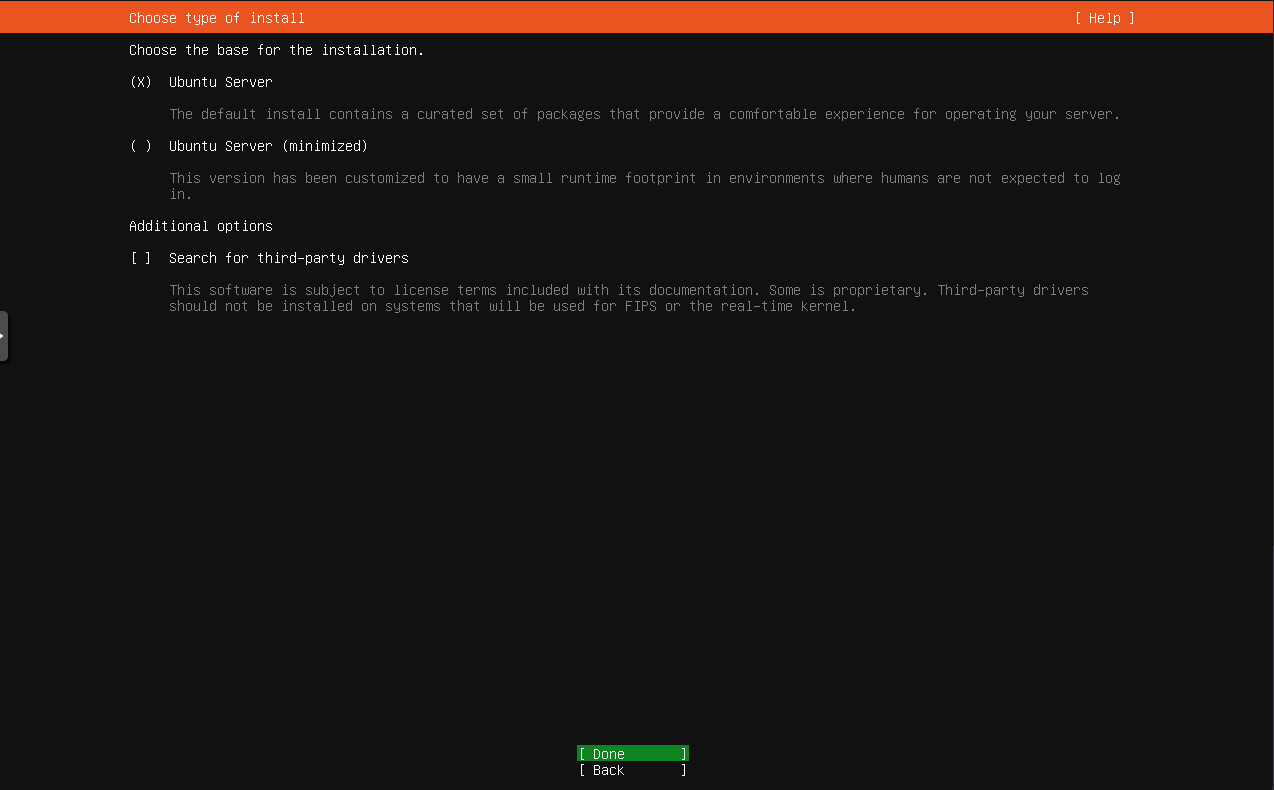
Ubuntu Selection
Select Ubuntu Server
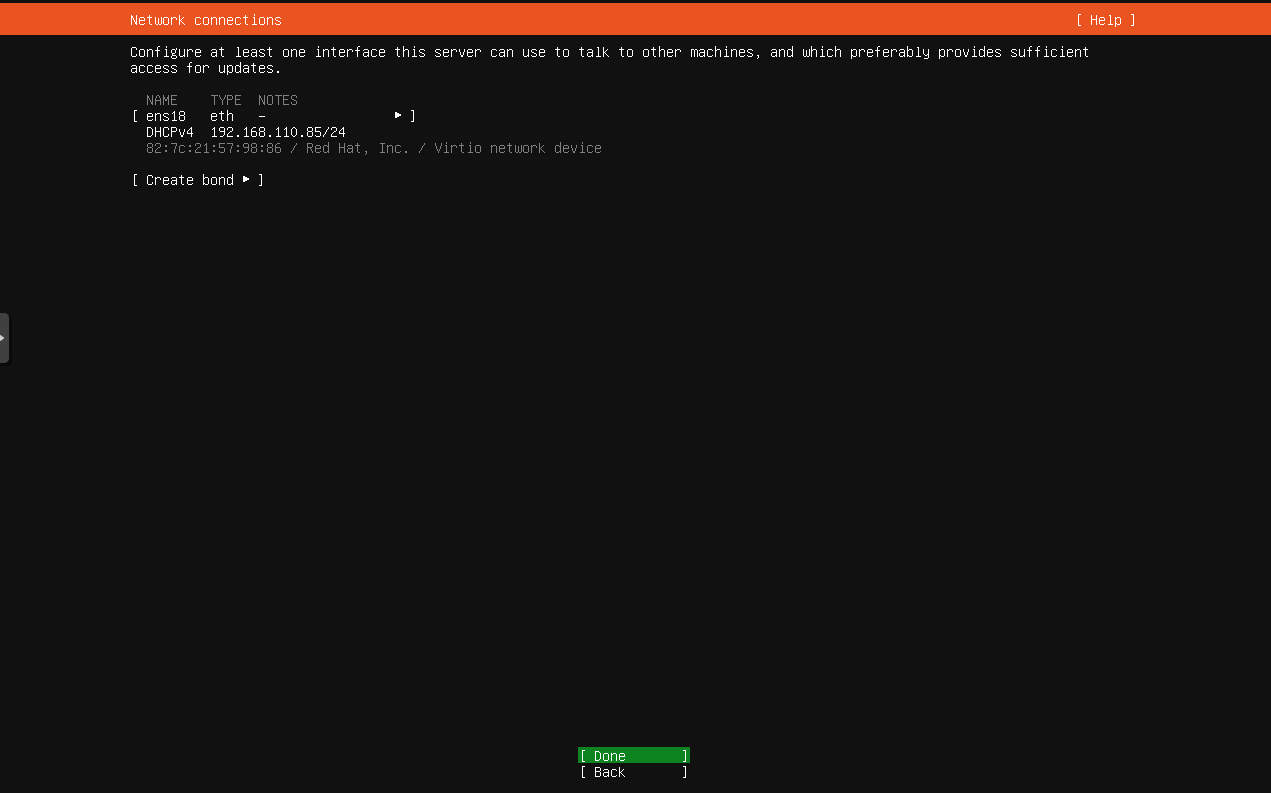
Network Connection
As of this example my network is under 192.168.110.0/24 subnet, thats why my dhcp
address in the screen is 192.168.110.85/24 yours might be 192.168.1.x/24 the most
common subnets for home routers, if you dont know what you are doing skip the next
part and just click done on this part, the next part is about manually asigning
and ipv4 address.
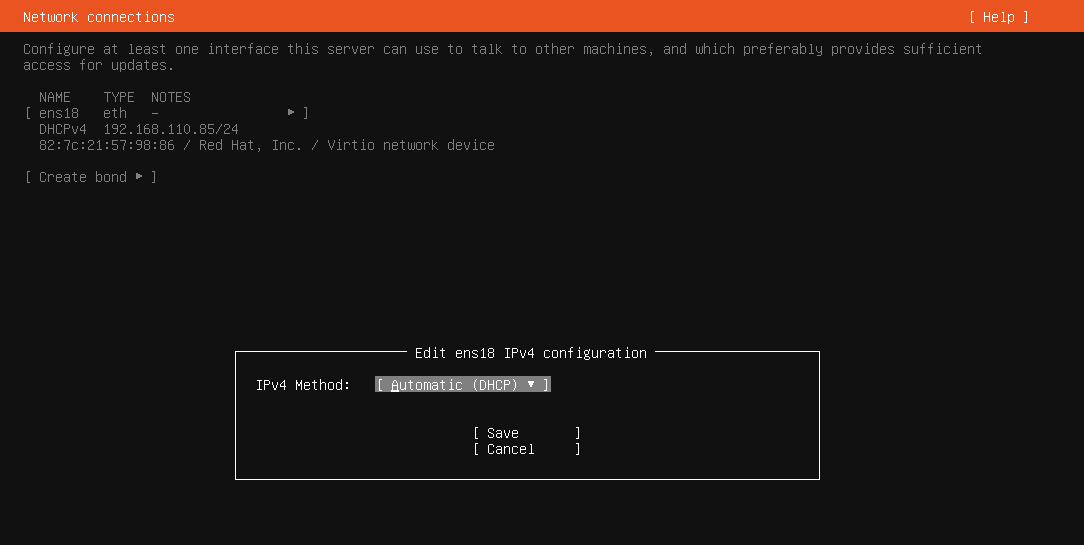
Static IP Assignment
- Navigate to the ether port using arrow keys press
enterthen go toedit
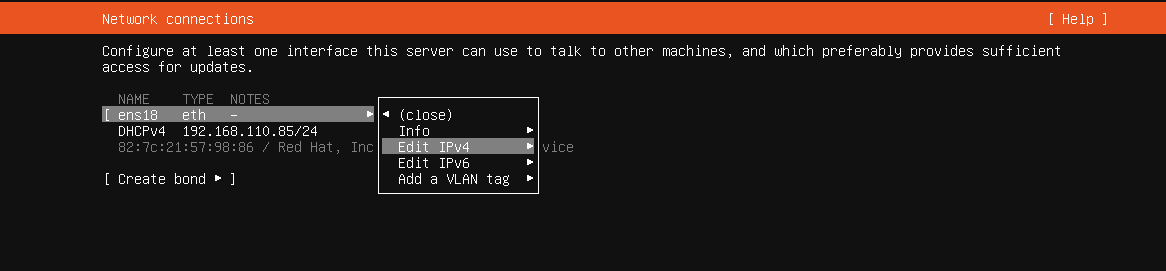
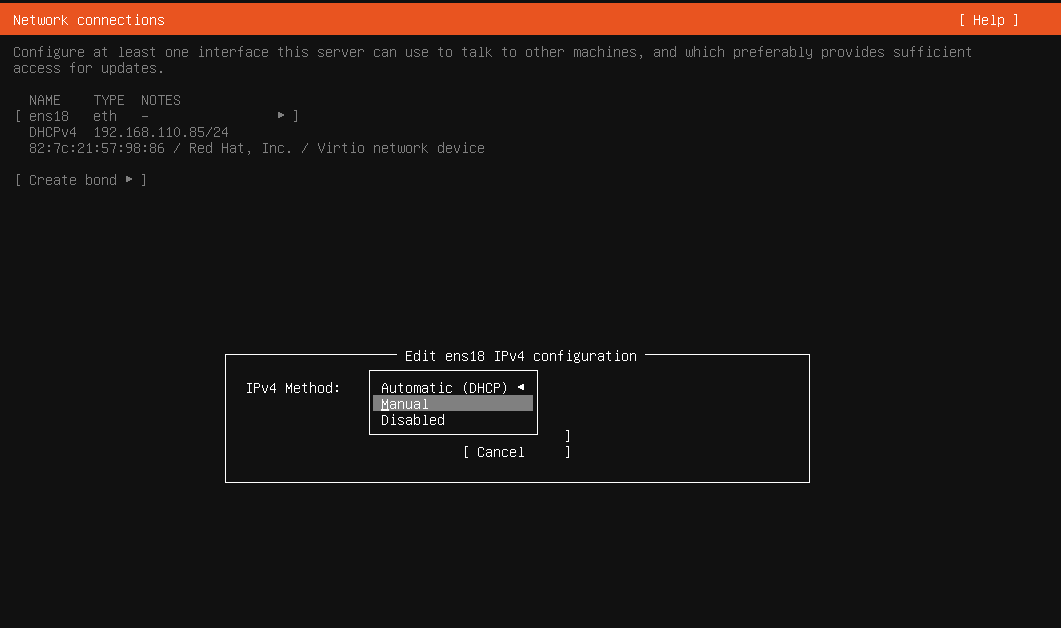
- A new popup below will show you what
IPv4 Methodyou want to use pressenter, you are in this section so selectManual
- A new popup with the following labels
Subnet , Address, Gateway, Name servers, Search domains
- Subnet e.g
192.168.1.0/24if you dont understand it click here - Address e.g
192.168.1.137you can replace 137, you dont know what it is? click here - Gateway e.g
192.168.1.1your router address, for more info click here - Name servers e.g
8.8.8.8is google’s public dns1.1.1.1is cloudflare enter multitple with comma8.8.8.8,8.8.8.4or1.1.1.1,1.1.1.4
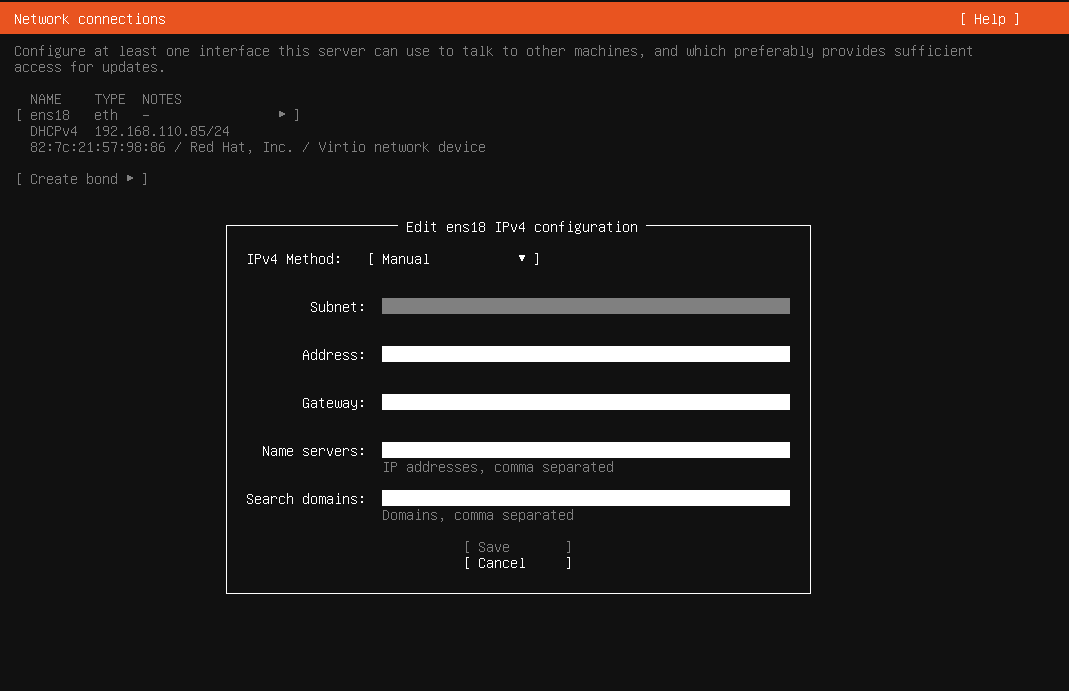
For reference here is what i entered while doing this guide

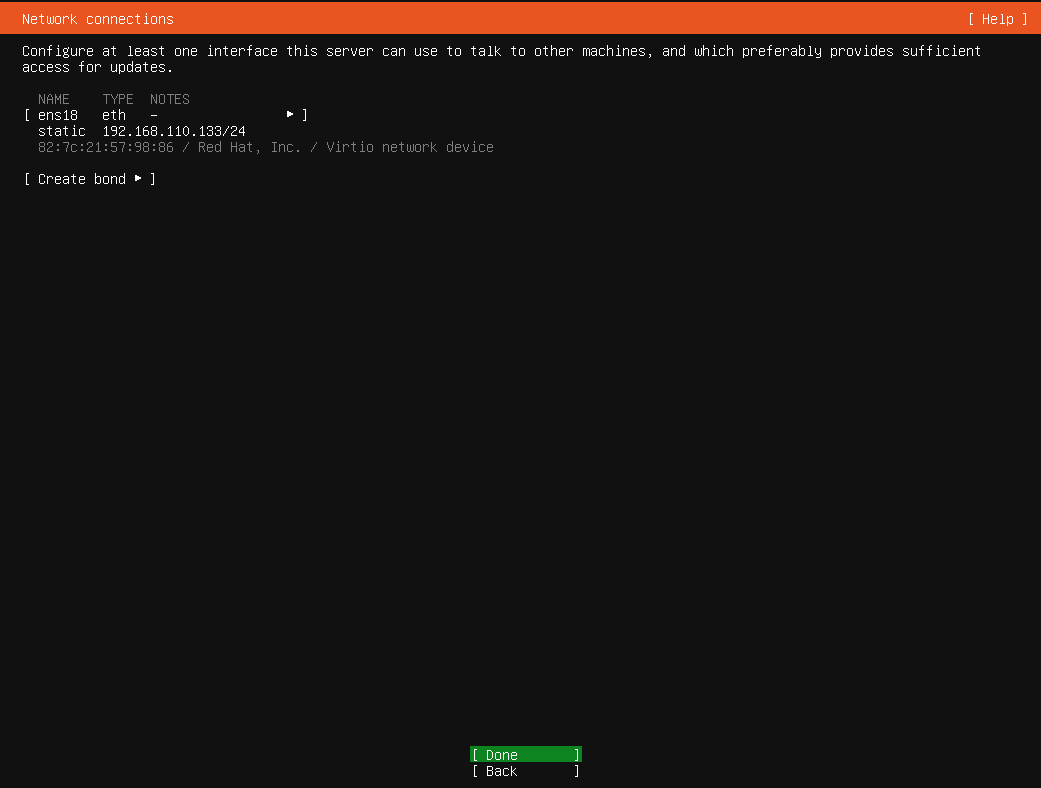
Network Setup Done
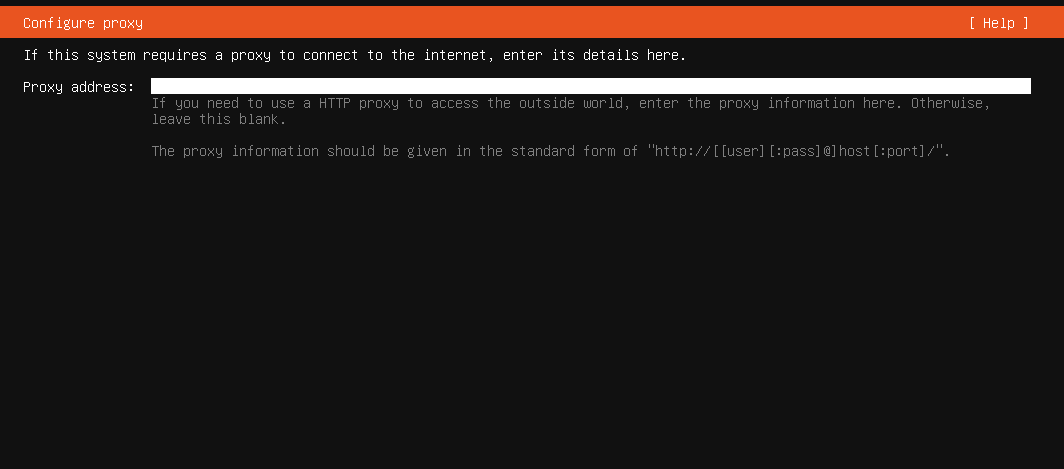
Setup Mirror
Mirror is where we download packages from a certain server when we do something like apt install neovim
if you are not using any vpn, the installer will detect and give us ph server as default

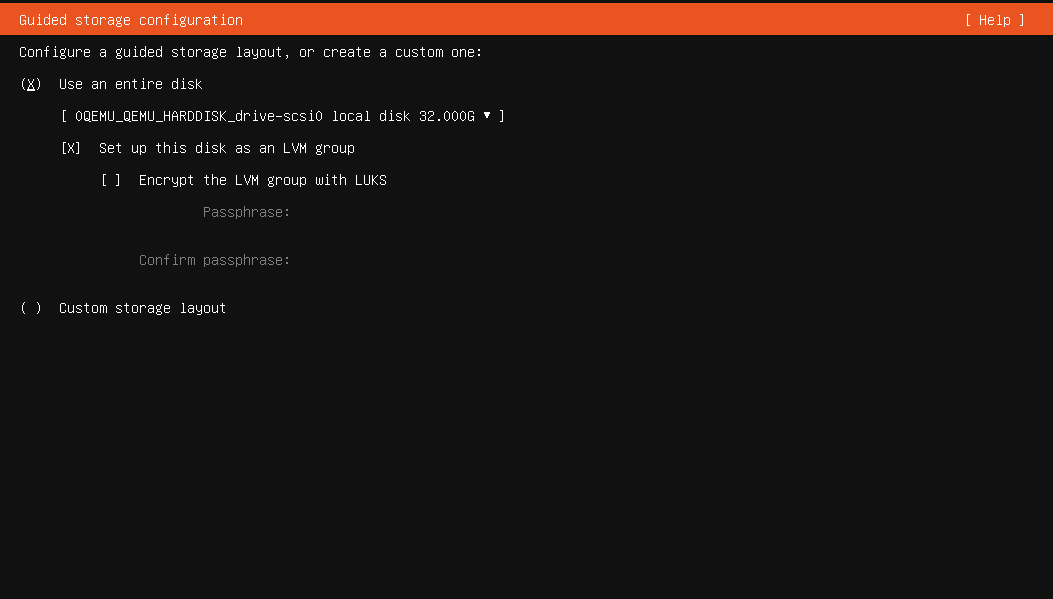
Storage
I will not dive deep into this but this is basically where you set your storage size and partition
depending on what machine you are doing this from it will show the hardisk in your system in this demo
i allocated 32gb of storage space and i will use it all, in your case if you are on a physical machine
partition it well or use the entire ssd there is also an encryption option its up to you wether you want
the data of this system encrypted or not press enter
Storage Configuration
This screen shows you how ubuntu assigns 3 partitions, sizes will depend on your storage medium used for the installation.
partition 1is for theBIOS/UEFIgrub1MBpartition 2is for the/boot2GBpartition 3is where your system files and/home/yourusernamewill be stored29.997GB
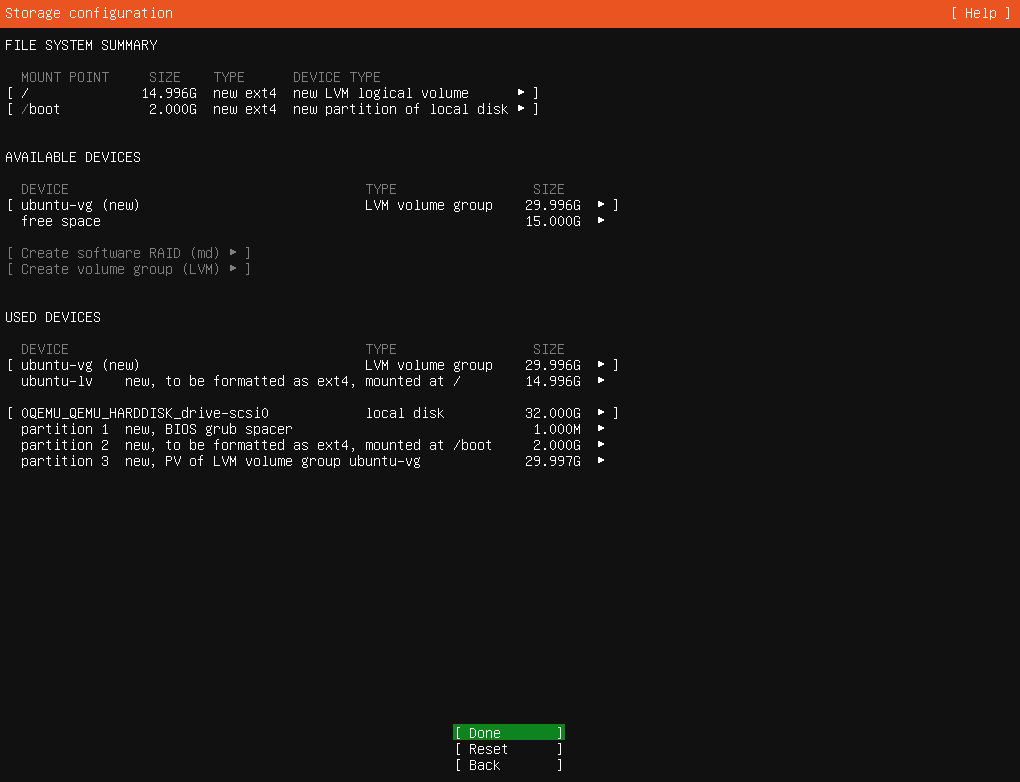
Finish storage setup
If you are fine with the default settings ubuntu installer did Confirm and Continue
this will format your storage medium.

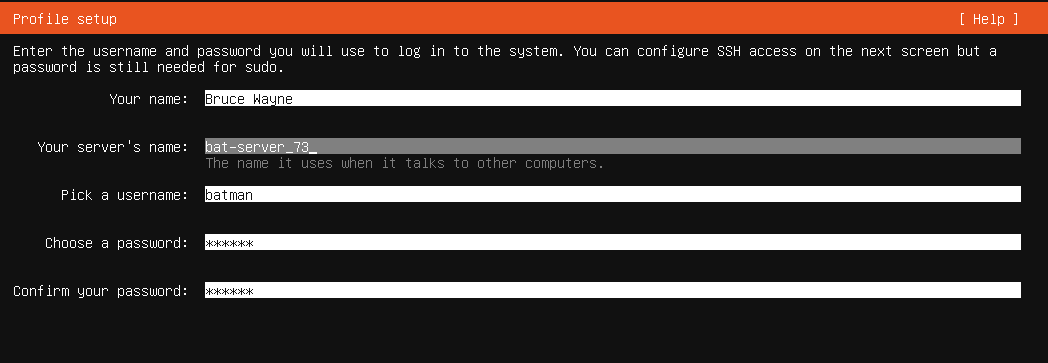
Setup Profile
Fill up the following
Your namee.gBruce Wayneyou can literally put anything hereServer namee.gbat-server_73this is how other machines recognize your machine aside from its MAC and IP addressesUsernamee.gbatmanthis is important as you will use this to ssh e.gssh batman@192.168.110.133Passworde.giambatmanchoose a secure password
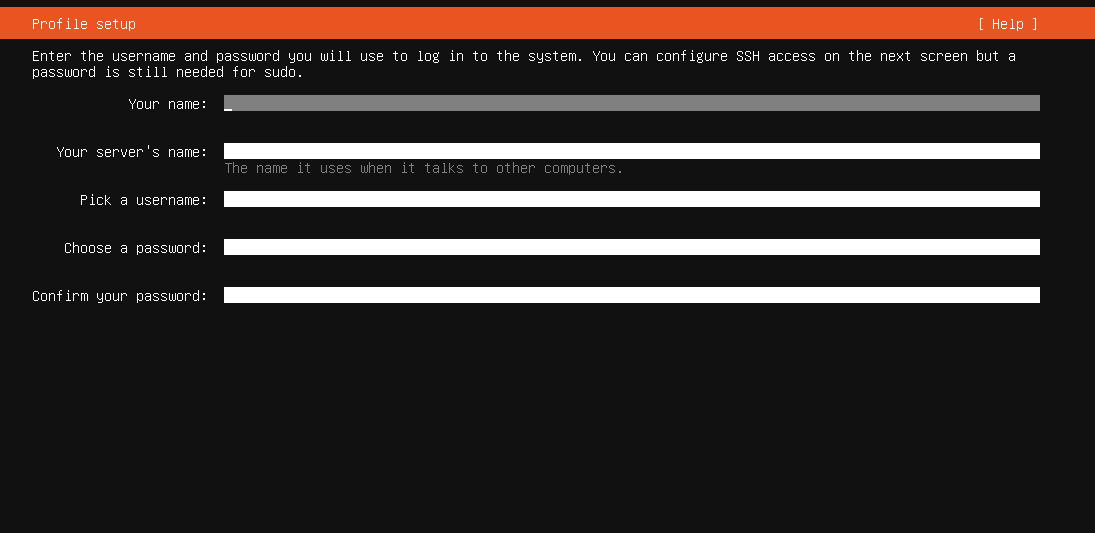
Fill up Profile
Ubuntu Pro
Well if you can afford why not?

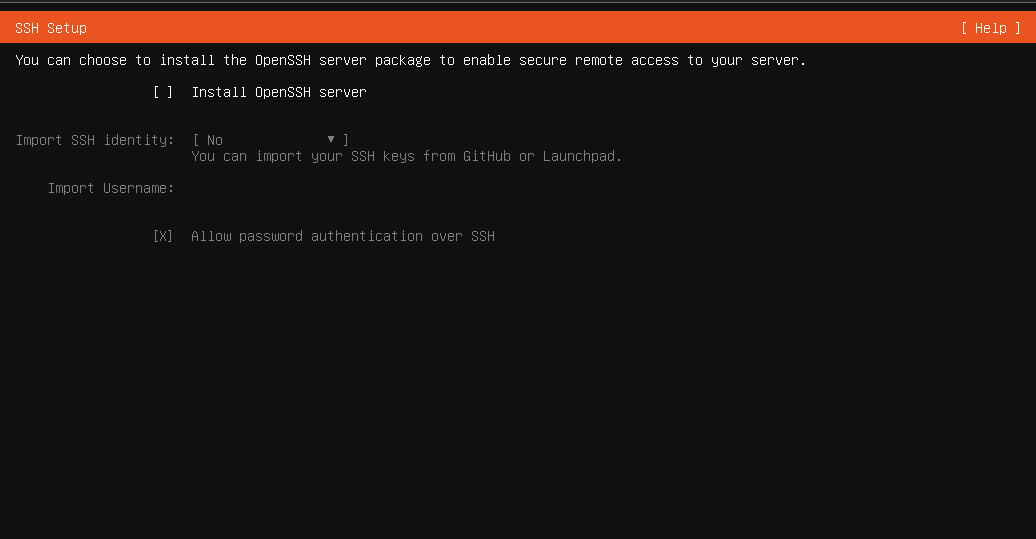
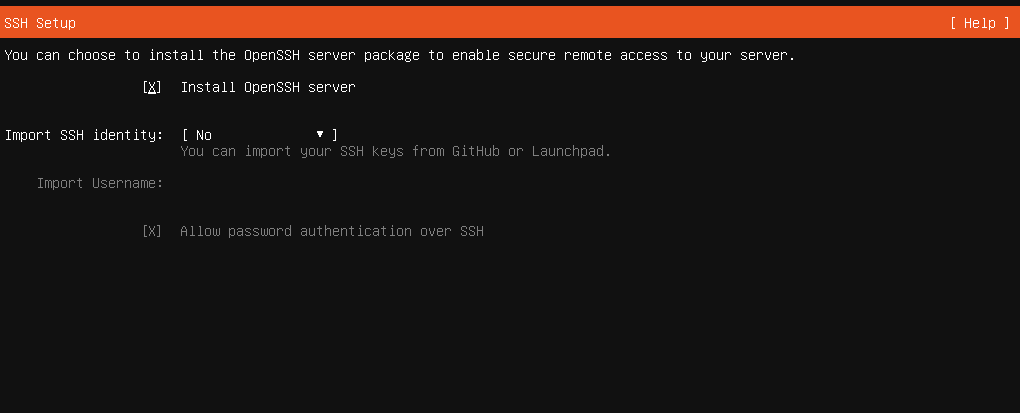
Open SSH
Install it as we are gonna use OpenSSH server to connect and do more with our server
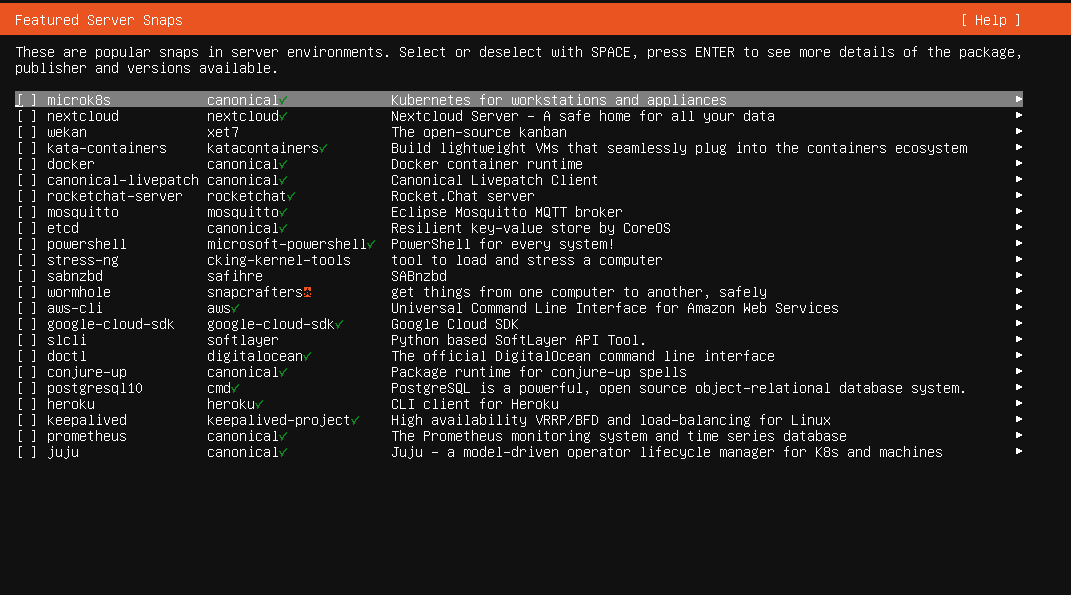
Featured Snaps
In this screen we wont install anything as we will dockerize services like nextcloud
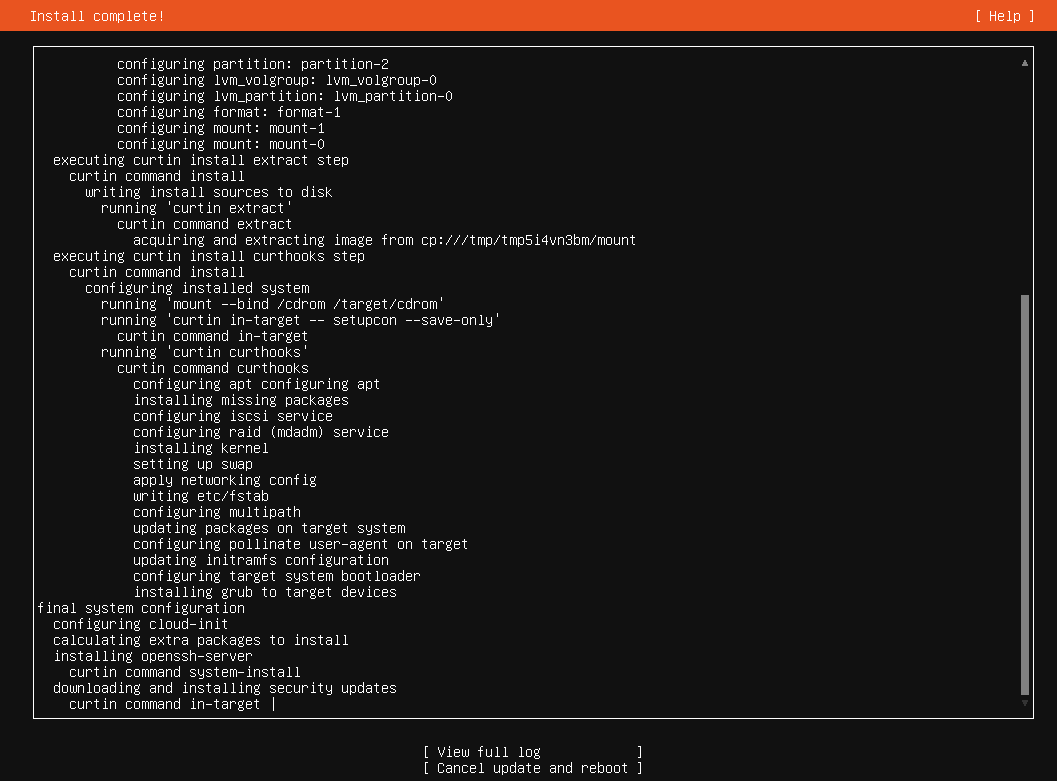
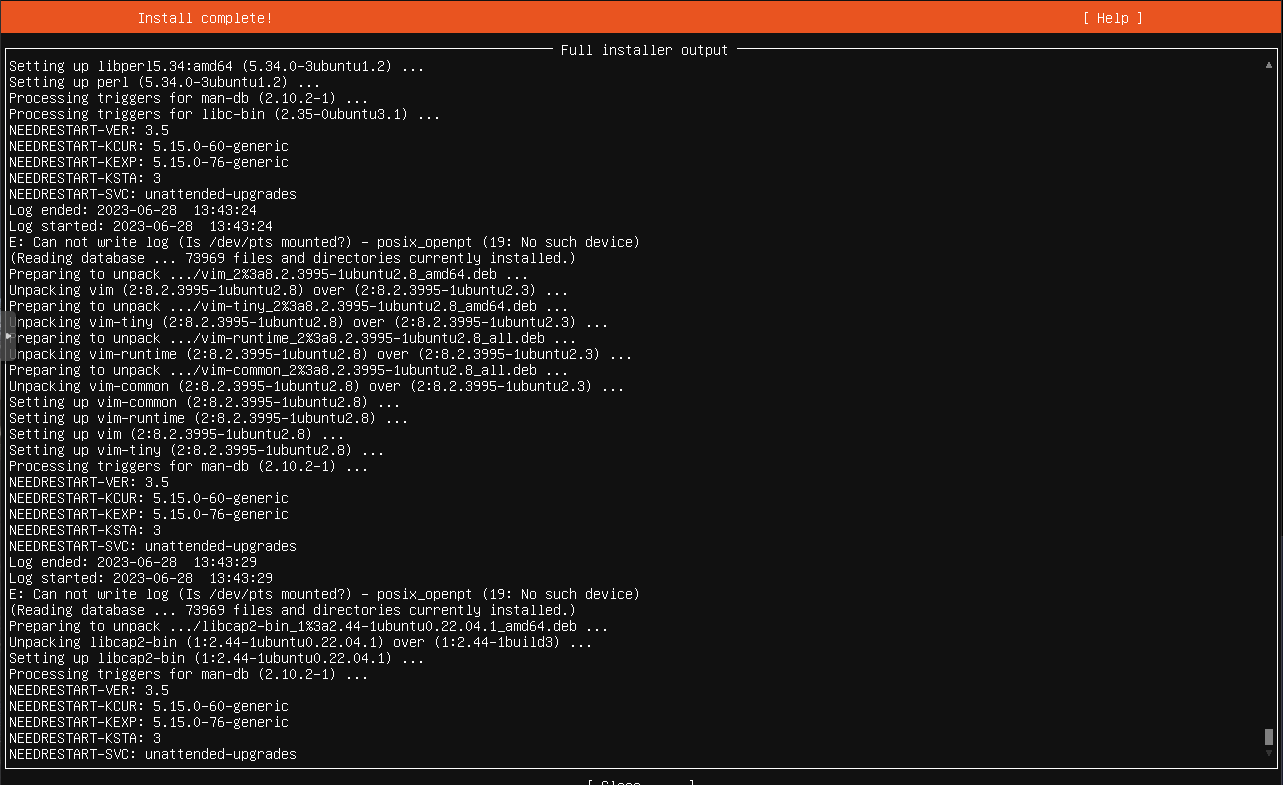
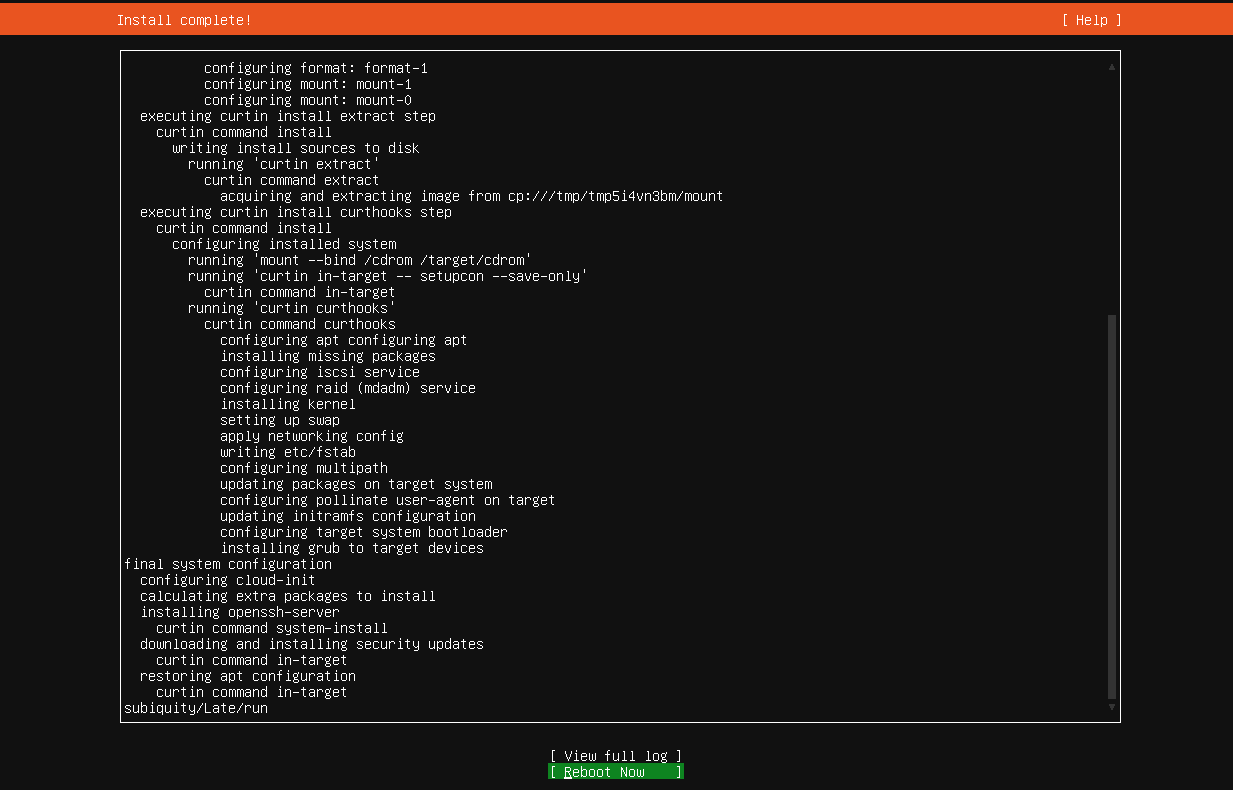
Install Complete
Now the wait begins as get a cup of coffee, depending on how old your installer is the update
will take long, Reboot after it is done!
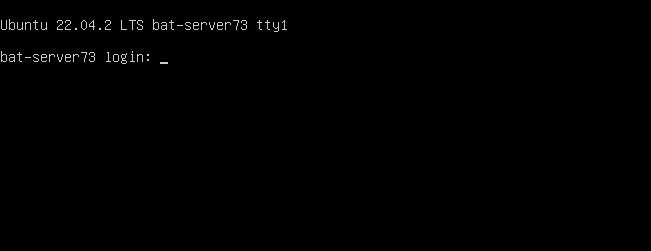
Your first boot
First Boot
The machine is now ready to be hacked!
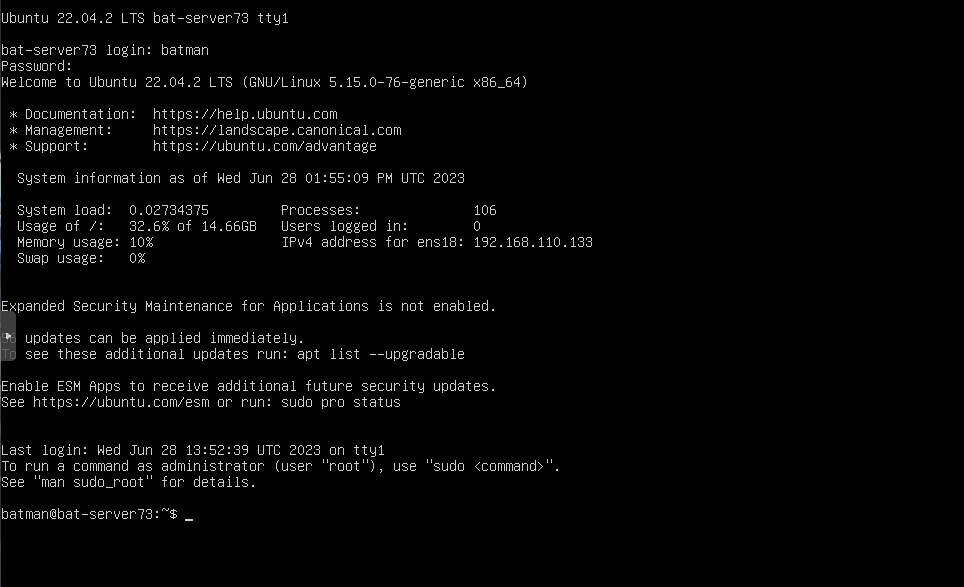
Connecting to our server
SSH Login
Open a terminal in your workstation and connect through ssh
depending on what username and ipaddress of your server is assuming that you are on the same network
you can use this command to connect to the server
ssh username@ipv4address
a password will be asked
ssh batman@1192.168.110.133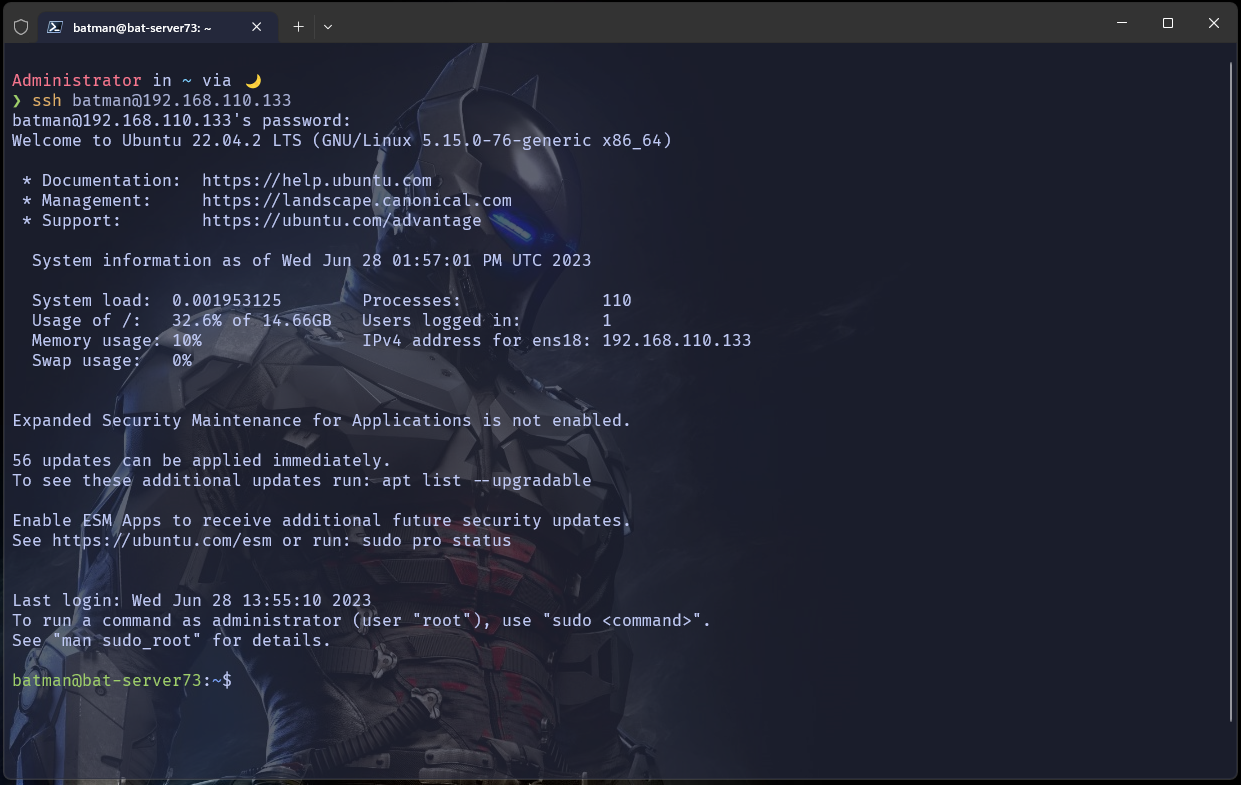
Updating our server
First update
on your terminal update your server with the following commands
these are 2 commands for just checking updates use sudo apt update these updates and references the list of packages
you have installed if a new version is released, sudo apt upgrade upgrade all the packages
sudo apt update && sudo apt upgradeAfter entering the command you will be prompted with Y/n if you want to upgrade enter Y and enter
Depending on how heavy the update is and whether it affects services a screen will appear in your terminal like the one below

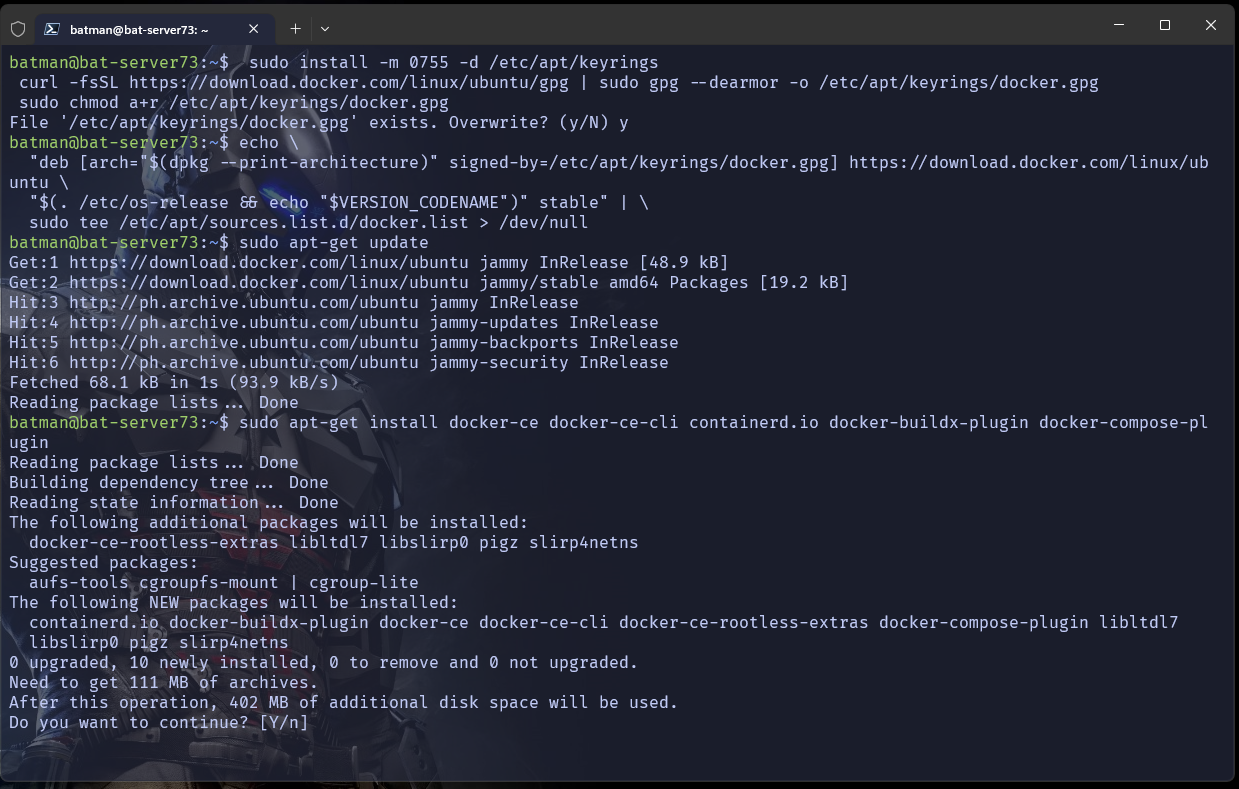
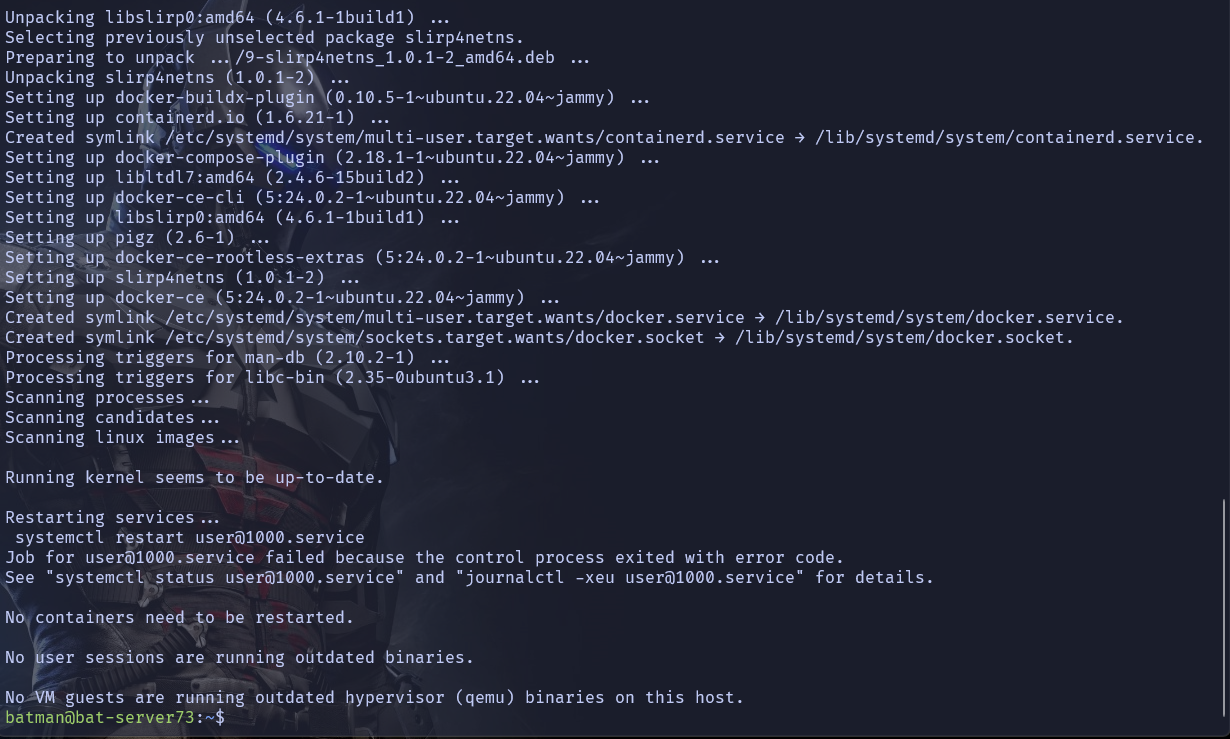
Installing Docker and Portainer
open your terminal copy paste the entire snippet and run it
sudo apt-get install ca-certificates curl gnupg

sudo install -m 0755 -d /etc/apt/keyrings
curl -fsSL https://download.docker.com/linux/ubuntu/gpg | sudo gpg --dearmor -o /etc/apt/keyrings/docker.gpg
sudo chmod a+r /etc/apt/keyrings/docker.gpg

echo
 "deb [arch="$(dpkg --print-architecture)" signed-by=/etc/apt/keyrings/docker.gpg] https://download.docker.com/linux/ubuntu
 "$(. /etc/os-release && echo "$VERSION_CODENAME")" stable" |
 sudo tee /etc/apt/sources.list.d/docker.list > /dev/null

sudo apt-get update

sudo apt-get install docker-ce docker-ce-cli containerd.io docker-buildx-plugin docker-compose-plugin docker-compose
Terminal Output
Checking docker installation
sudo docker ps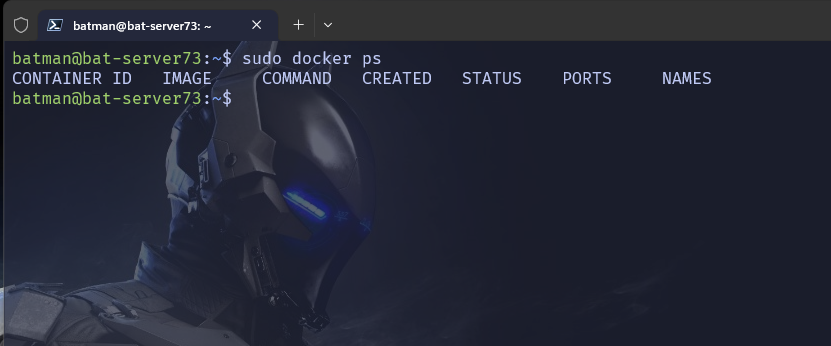
Additional docker commands to add you the $USER so you dont need to sudo docker commands anymore
sudo groupadd docker
sudo usermod -aG docker $USER
newgrp docker
Installing Portainer
The following command does the following for us
- downloads the latest portainer image
- sets the container to restart always on failure
- exposes port 9000 for http where we can access our portainer web page later at
192.168.110.133:9000 - adds volumes for its dependencies
- check the docs if you want to deploy it on https port on 9443
sudo docker run -d -p 8000:8000 -p 9443:9443 -p 9000:9000 --name portainer --restart=always -v /var/run/docker.sock:/var/run/docker.sock -v portainer_data:/data portainer/portainer-ce:latest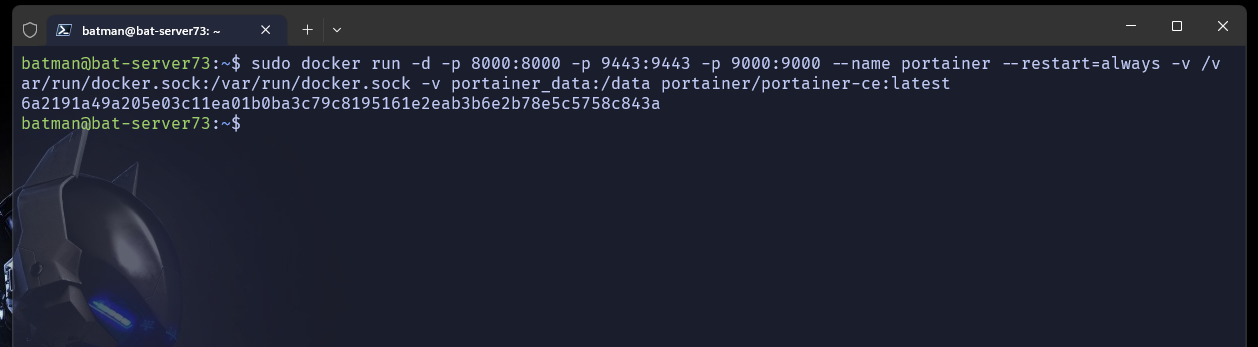
After succesful installation we can now access the web page
in your browser go to assignedIpv4:9000 replace ipv4 to whatever your dhcp server assigned to your server
or whatever you set statically
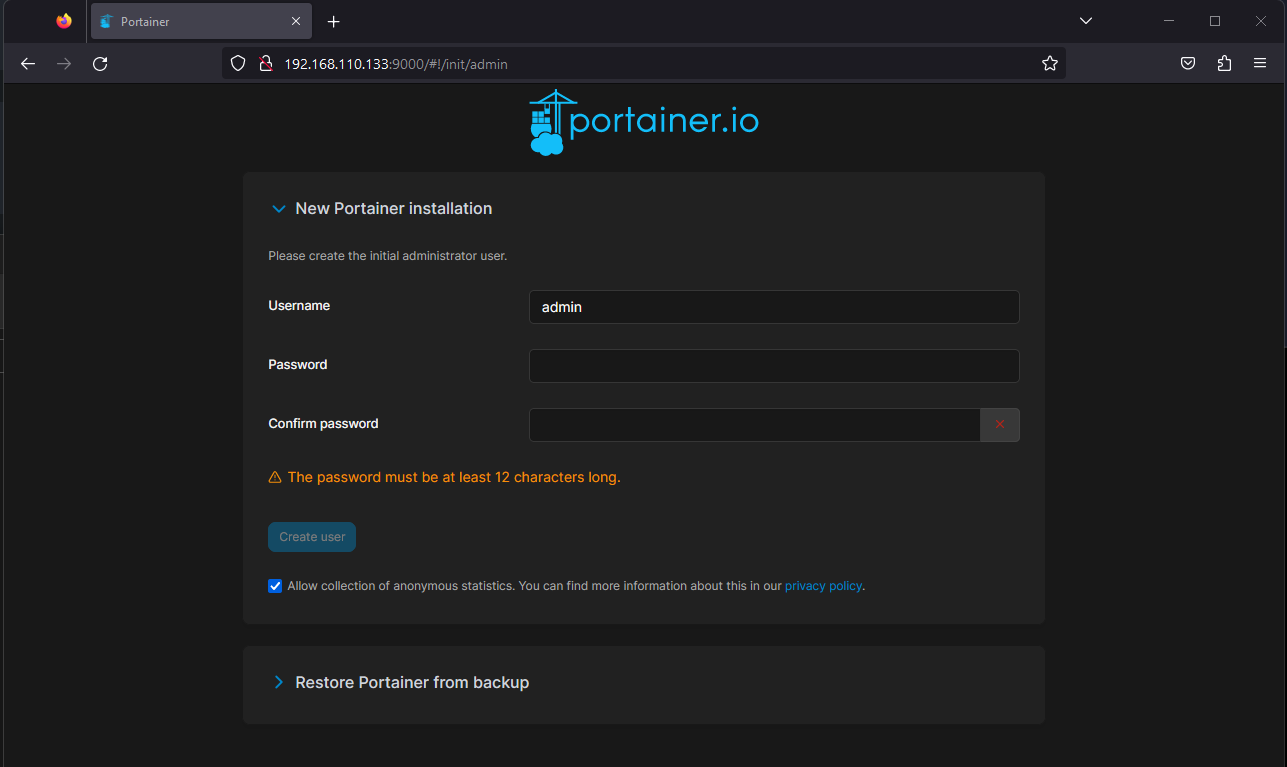
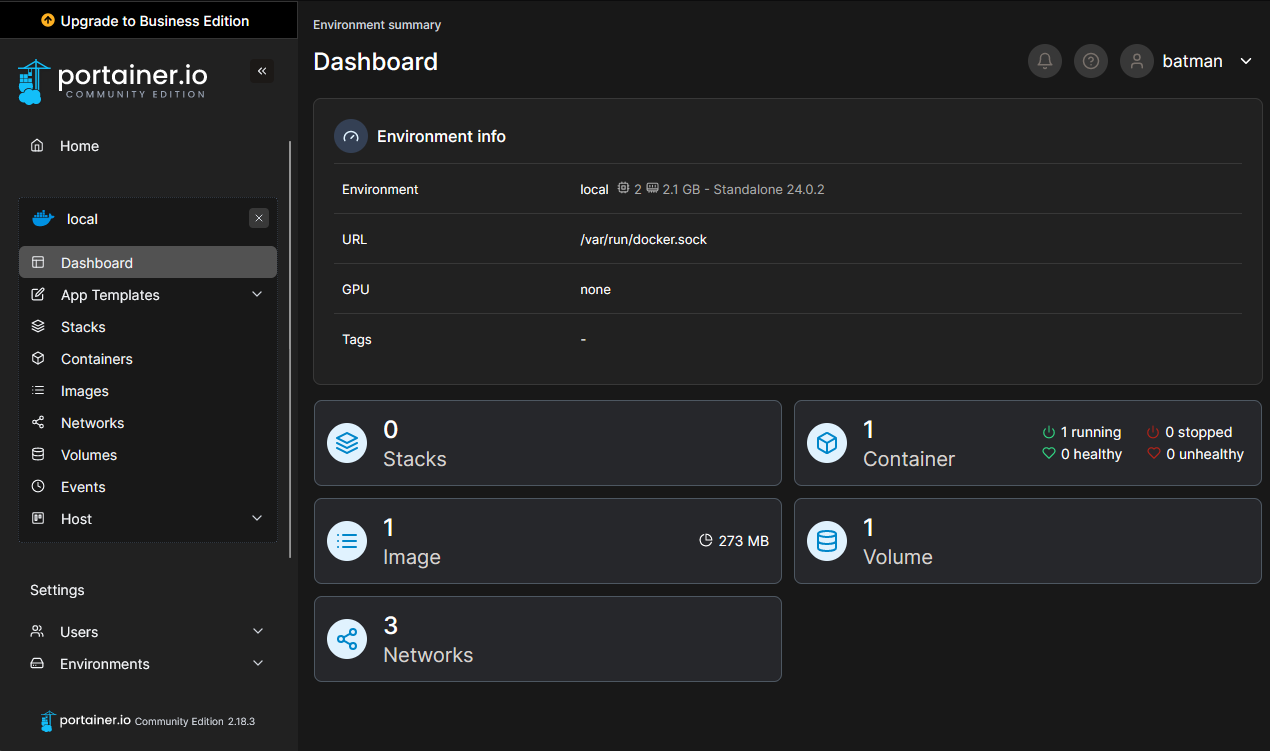
Setup your account where it needs username and password after that login and add a welcome screen appears
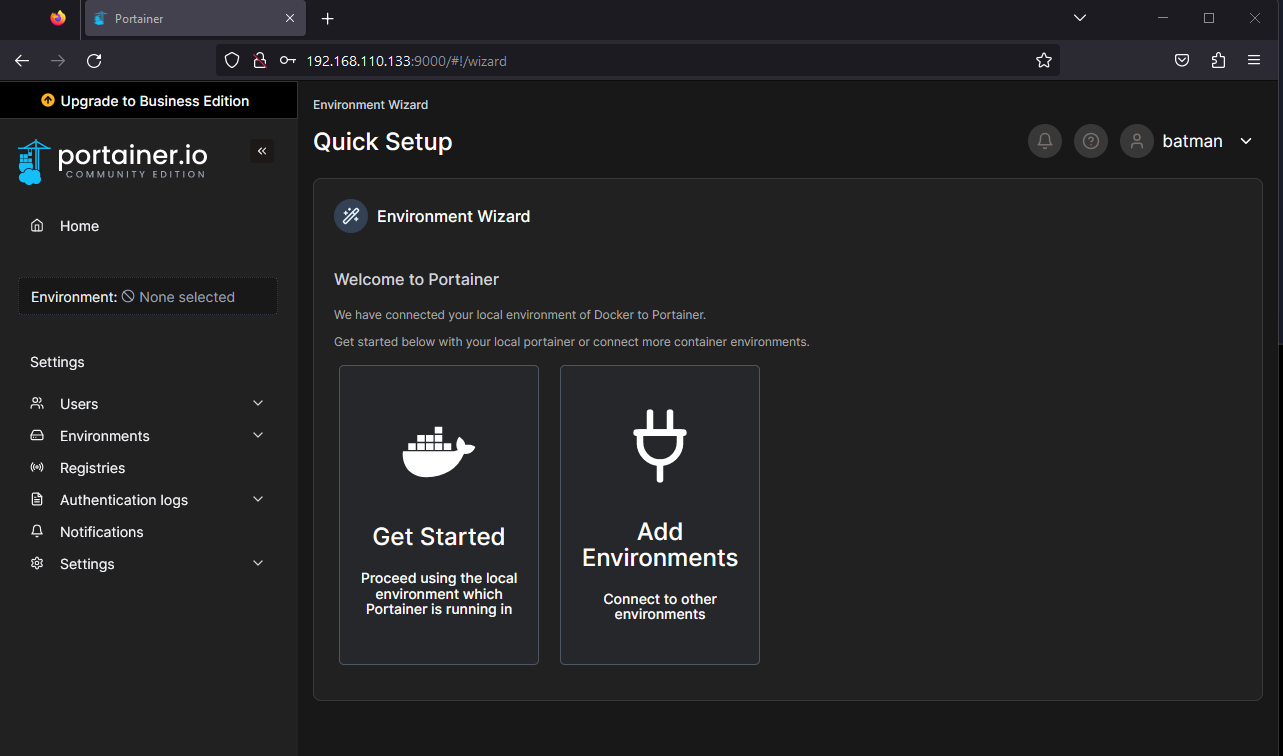
Click Home and you are presented with your local docker instance

Click live connect and you will be navigated to your local instance dashboard
Go to app templates and feel free to install any template you want a good example would be File Browser
i havent used it myself but basically you can navigate your server files and folders in through your web browser
Installing Postgres and PgAdmin4
Before proceeding we can check that on our docker ps command portainer exists and is running well
docker ps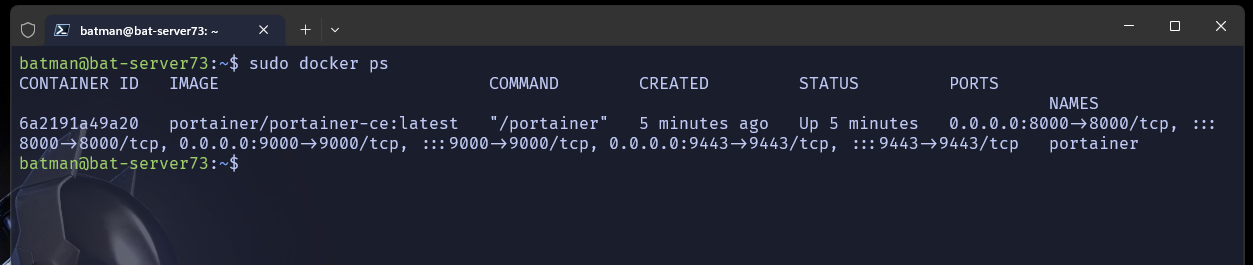
No we can start installing PostgresSQL and PgAdmin4 there are 2 ways we can install The first option is below
First option
- Create a docker volume where postgres sql db file will be persisted
sudo docker volume create postgresqldata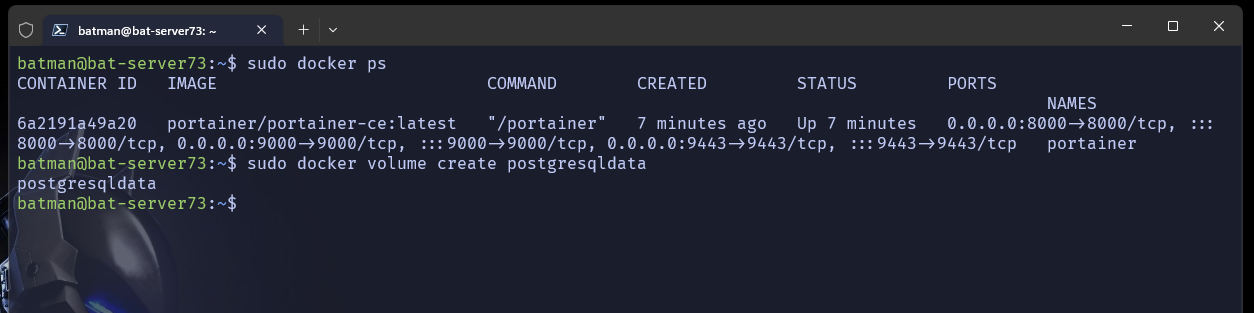
- Postgres Installation
- This downloads the postgres image from docker repository/registry
- Uses the volume we created earlier with
/data/dblocation - Exposes the
5432port, postgres defalt port, allows us to connect to postgres through192.168.110.133:5432this address - Default username is
postgreswe set the password topostgresfeel free to replace it
sudo docker run -d -v postgresqldata:/data/db -e POSTGRES_PASSWORD=postgres --name postgres -p 5432:5432 postgres- Install and run docker named pgadmin, replace
mac@mkra.devandsomethingsecretwith your email and desired password
- This downloads the dpage/pgadmin4 image from docker repository/registry
- Exposes the
8080port, the default port is 80, but we can use that default http port for something else - We can access the web page through
192.168.110.8080feel free to use other ports - replace
mac@mkra.devandsomethingsecretwith your email and desired password
sudo docker run --name pgadmin -e "PGADMIN_DEFAULT_EMAIL=mac@mkra.dev" -e "PGADMIN_DEFAULT_PASSWORD=somethingsecret" -p 8080:80 -d dpage/pgadmin4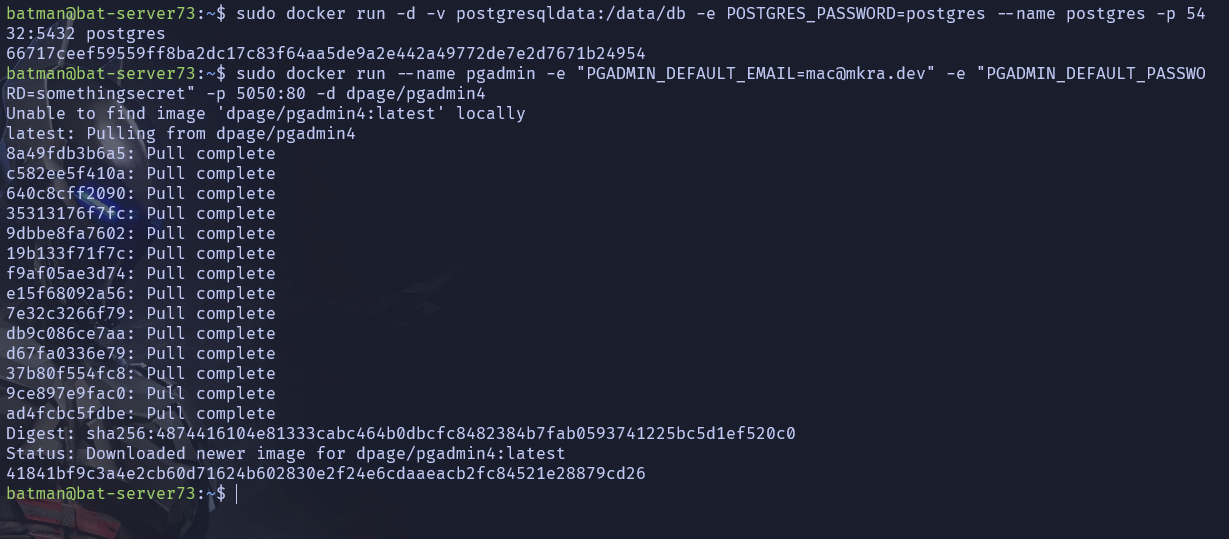
- Connect them together
sudo docker network create --driver bridge pgnetwork
sudo docker network connect pgnetwork pgadmin
sudo docker network connect pgnetwork postgres
# check network bridge
docker network inspect pgnetwork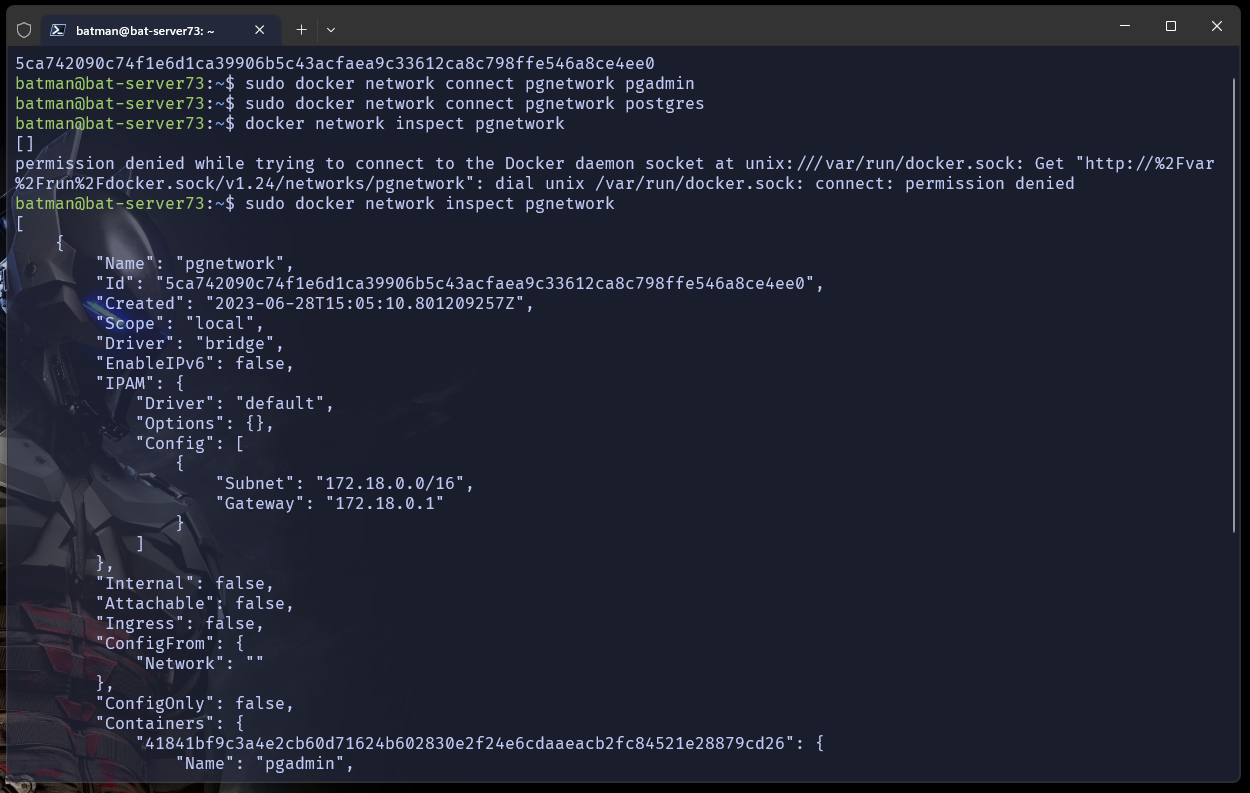
Additional optins on portainer settings we could have done it on the commands above but i want to show you how to use the portainer also
Navigate and login to your portainer web page e.g
192.168.110.133:9000Live connect to your local instance check containers and you will see the following
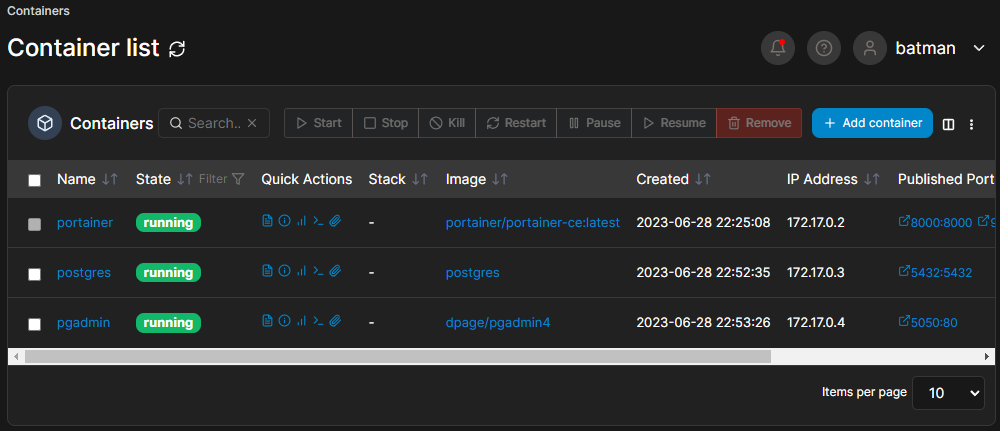
if You cant see the Published Ports of the container we created you did something wrong!
Click on the container
postgresand if you scroll down you will seeContainer detailsOn
RESTART_POLICIESwhere the default is set tononechange it toalways
Do the same thing with
pgadmincontainer
Second Option
Docker compose
version: '3.9'

services:
  pg:
    container_name: postgres
    image: postgres
    # automatically restarts the container - Docker daemon on restart or
    # the container itself is manually restarted
    restart: always
    volumes:
      - postgresqldata:/data/db

    environment:
      POSTGRES_USER: postgres
      POSTGRES_PASSWORD: postgres
      POSTGRES_DB: postgres
    ports:
      - '5432:5432'
    networks:
      - bridge
      - pgnetwork

  pgadmin:
    container_name: pgadmin4
    image: dpage/pgadmin4
    restart: always

    environment:
      PGADMIN_DEFAULT_EMAIL: root@root.com
      PGADMIN_DEFAULT_PASSWORD: root

    ports:
      - '8080:80'
    networks:
      - bridge
      - pgnetwork

volumes:
  postgresqldata:

networks:
  bridge:
  pgnetwork:
Create a docker-compose.yaml anywhere in your home directory for me i store my docker-compose files at composers
in the directory where you created your docker-compose.yaml enter the following commands
docker compose upAdditional runtime dependencies needed
- build-essentials and cmake
- nvm(Node Version Manager)
sudo apt install build-essentials cmake zsh
type -p curl >/dev/null || (sudo apt update && sudo apt install curl -y)
curl -fsSL https://cli.github.com/packages/githubcli-archive-keyring.gpg | sudo dd of=/usr/share/keyrings/githubcli-archive-keyring.gpg
&& sudo chmod go+r /usr/share/keyrings/githubcli-archive-keyring.gpg
&& echo "deb [arch=$(dpkg --print-architecture) signed-by=/usr/share/keyrings/githubcli-archive-keyring.gpg] https://cli.github.com/packages stable main" | sudo tee /etc/apt/sources.list.d/github-cli.list > /dev/null
&& sudo apt update
&& sudo apt install gh -y

sh -c "$(curl -fsSL https://raw.githubusercontent.com/ohmyzsh/ohmyzsh/master/tools/install.sh)"

curl --proto '=https' --tlsv1.2 -sSf https://sh.rustup.rs | sh

clone dotfiles
curl -o- https://raw.githubusercontent.com/nvm-sh/nvm/v0.39.3/install.sh | bash
I will update this post more with more examples